Pages

Welcome to The Painted Squirrel!


Magic is believing in yourself. If you can do that, you can do anything! - Johann Wolfgang Van Goethe

Sunday, October 14, 2012

Knobby Needs!

There are times when you really don't want to paint an entire piece of furniture - either it's an heirloom or you only need it temporarily in a space, or maybe it's a serviceable but not a high quality piece and wouldn't take the paint very well.  Painting or changing out the knobs and even the feet can give a piece a whole new look and you can even change them with the seasons if you like!  When the piece is ready for it's next adventure, just switch them out again and it has a whole new look! 

Here's how to start.  Find something in the room that will inspire you.  In this example, it was these adorable little pictures hanging in this little girls room.
I love the little details in each of the petals and the colors are so sweet.  It could be a bedspread pattern that you love, or just a basic theme of sports or ballet, whatever you like.
I decided to use wooden flowers as a back plate and the knobs as the center of the flower.  If you go to your local craft store, Michaels or AC Moore or Hobby Lobby, they will almost always have an aisle of unfinished wooden pieces in all kinds of shapes that you can use as a back plate.  They cost a dollar or two so they are very inexpensive.  You will want to prime it and drill a little hole for the screw before you paint it.  You may also need to get a slightly longer screw from the hardware store to accomodate the added width of the  back plate.  If you look closely, you will notice that all of my designs in the photo above are very simple, polka dots and little swirls.  The insects are fairly easy to paint, but if you don't want to do that, you can buy miniatures and just glue them on (keeping in mind the age of the child of course, they could be pulled off and present a choking hazard if your child is too young).
Here are the knobs placed on top of the back plates, and also  the dresser with the knobs installed.  Isn't it cute?  As the little girl grows, the knobs can be changed out for something else and the furniture hasn't changed a bit.
Below are some examples of using fabric to inspire the design.  If you aren't comfortable painting it freehand you can always copy the fabric onto paper and use carbon (or transfer) paper to transfer the design onto the knob.  Your craft store should have that as well. 


And a little "foot"note...if your furniture has feet that can unscrew, why not paint those as well?

And here is how the furniture looks after...


This one was a bit more than just the knobs and feet, but even without painting the back and the handpainting up top, there would have been a difference!


Now I realize all of these examples are for girls, but for boys you can do a sports theme with soccer balls and baseballs, or trucks and cars, or forget getting too fancy and just paint the knobs the colors of the room!  Seal them when you are done painting and always hang onto the old hardware, especially if it's a family piece.  These are alot of fun to do and you can even get the kids involved to paint their own.  Just throw on the classic DVD Bedknobs and Broomsticks and have a ball!


Welcome! Welcome!


Welcome to The Painted Squirrel!  Thank you so much for joining me here!  Up until recently, I have been sharing my projects only on Facebook.  I appreciate every person who has ever visited me there and my hope is that now that I've moved into a blog format, I will be able to share even more about these transformations and all things home!  I am sure I will have to tweak things here and there as I learn this new technology (not being a left brained thinker, new technology isn't always easy for me!) and I would love to hear any suggestions or comments from you!

So, my big flowery swim cap is on and here I go diving into the blog pool!  BONZAI!

The maiden post - A Display of Vanity!

I have been keeping my eye open for something I could use as a vanity for quite a while now. I wanted something a little different and also substantial enough to hold all of the products that make me presentable to the world (and there are quite a few). Recently I found this antique desk on Craigslist for $50!
Craigslist Photo
It was such a great price that I emailed the owner and asked if there was anything wrong with the piece.  Legs sturdy?  Drawers OK?  She said yes and also mentioned she had several people interested so I asked her how early I could come and get it.  That is the key when alot of people are interested in something on Craigslist - GET THERE FIRST!  My sister agreed to meet me and help me get it in my car.  She was just coming off of a twelve hour night shift, and was still in her scrubs!  What a rock star!  I only had to poke her twice to wake her up! (kidding Sands!)

To get it into my ridiculously small car, we had to remove the base.  Even with it dismantled, I had to keep the back windows open with the ends of the legs sticking out on both sides!  Yes, I looked like a bull charging down the highway!  I really need a bigger car!

 
A good sanding over everything and now on to the fun part - PAINTING!
Primed and ready!  Antique purists may be fainting about now and it should be stated that painting an antique can devalue it.  I'm not worried about that because I am going for the function more than the value - although if someone were to tell me that I had painted over a priceless antique, I would cry, but then I would continue to use it as my vanity, lesson learned!

After - just look at how beautiful it turned out! 


Don't you just love the details on this piece?  I used the Benjamin Moore Alkyd enamel paint in white and "Smoke" blue, which is the same color as the walls, satin finish on both.  After the white was dry, I dry-brushed the raised embellishments in the smoke blue to highlight them and because the blue is such a soft shade, it is a very subtle but special detail.   I sprayed the hardware using a white metal spray paint.    When everything was dry, I postitioned the vanity next to the window for the natural light and of course I will be adding my magnifying/make up mirror and filling the drawers with all manner of goop, lotions and potions. 

Try this two toned look on something you own.   If you keep it simple, it's a great way to add a contemporary twist to an old piece of furniture!  Please let me know how it goes!

Friday, October 12, 2012

Dollar Daze

Eventually I would like either a lucite or glass/metal side table for my sitting room couch, but in the meantime I really needed to get something to put my lamp on.  I found this little Bombay Company side table at a yard sale a few weeks ago.  When I asked how much, the lady told me it was free!  "Just take if you want it," she said "but the top doesn't stay on the base."  My inner squirrel was so happy, but I felt funny about taking it for free because I jog by her house almost every day.  I didn't want her to look out her window and see me and think that I'm that woman who took her table for FREE!   So I gave her a dollar for it - wasn't that magnanimous of me?  Sheesh, I am certain she didn't think anything of it either way, she was very nice.. 
Someone had already primed it, so a light sanding and I was ready to go onto step two.  Two coats of Benjamin Moore white Alkyd paint in a satin finish.                                                       
Because I am using it in my sitting room, which is the same smoke blue and white room where I placed my vanity that I just finished.  I decided to stripe it in wide stripes to make it a little more contemporary. 
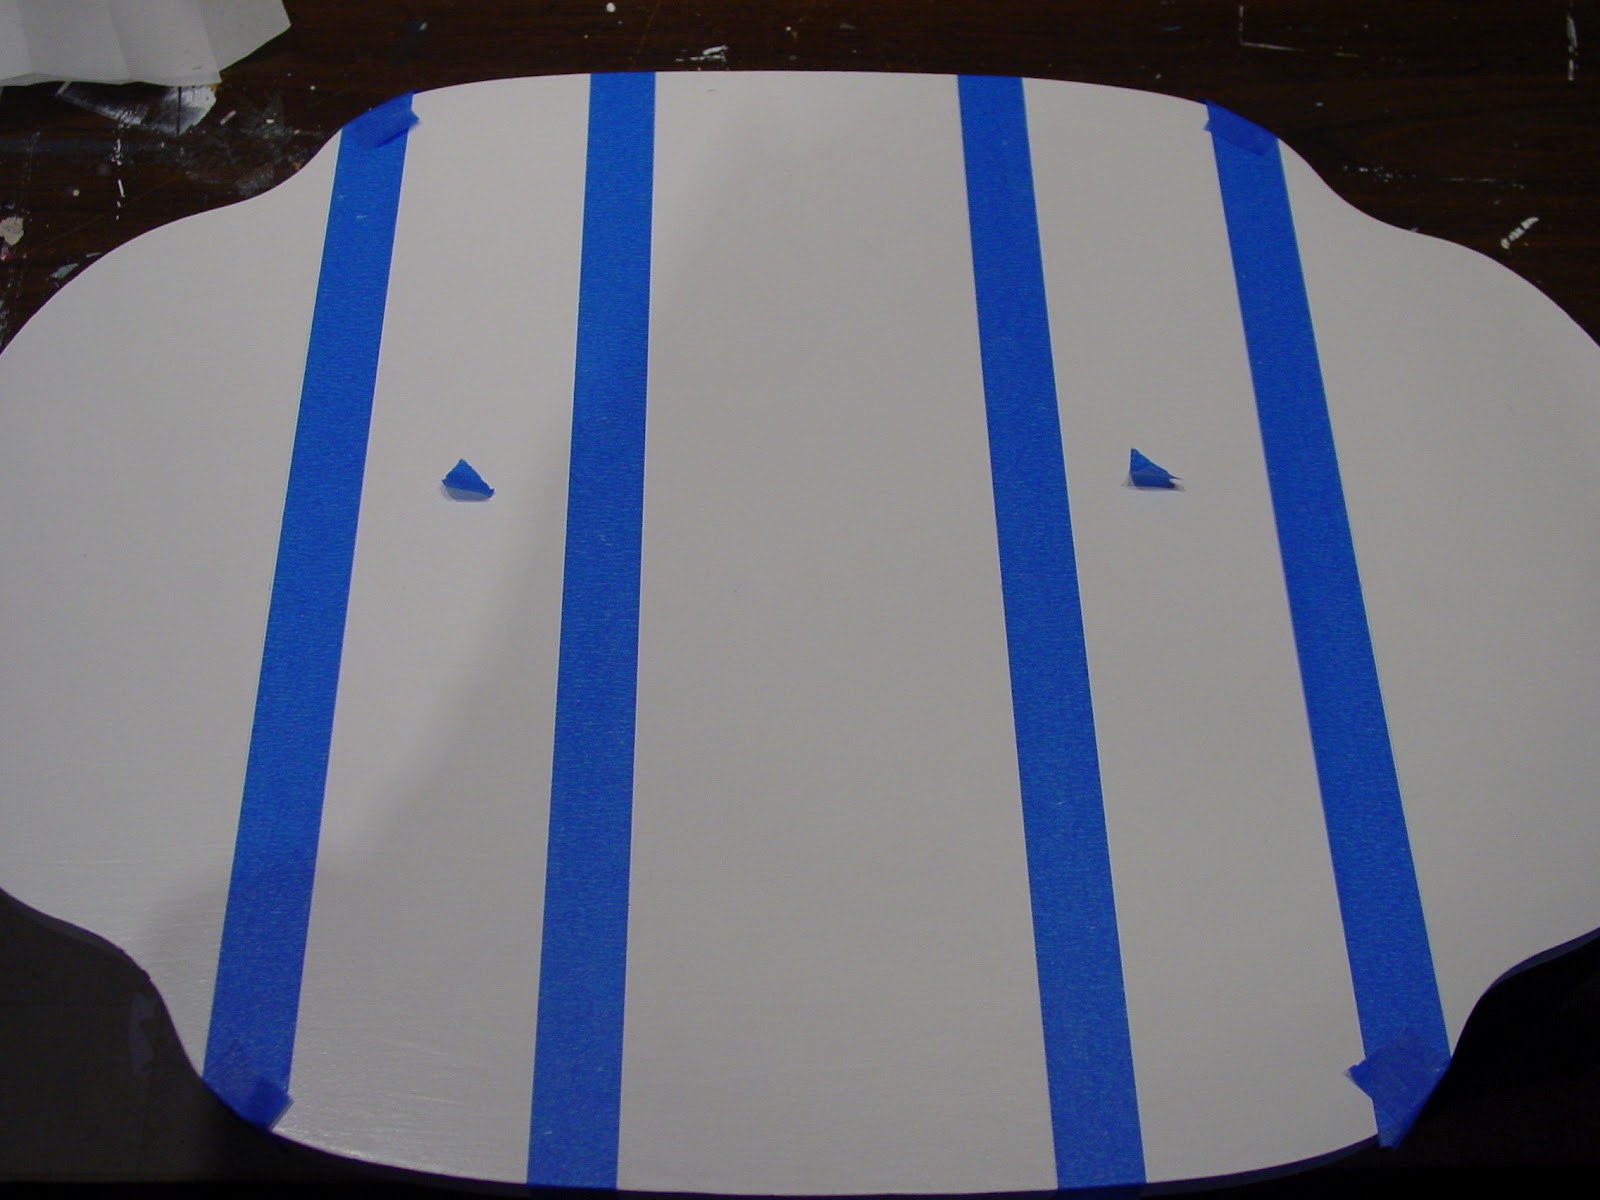
 When striping a piece of furniture, especially one small like this, I like to use an odd number of stripes so there is one exactly in the middle of the table - I just think it looks nice and balanced.  I decided five would work here and measured the table length, 23.75 inches.  The kids had the calculater so I pulled up my trusty google search and typed in 23.75 inches divided by 5 and the magical google gave me the answer to how wide each stripe should be!  I didn't even have to do math!  Life is good!
Now I used my blue painters tape and taped off my outside edges for the blue stripes.  A little hint when you are doing stripes, use a tiny piece of tape and put it in the middle of the stripes you DO NOT want to paint.  We can all get distracted sometimes and this helps keep me from accidentally painting the wrong one.  I rolled on two coats of my blue and removed the tape as soon as I was done with the second coat.  There was a little touch up to be done along the edge between the white and blue lines, which I used a little 1 inch artists brush to do and voila!  All done! 
The final challenge was to attach the base to the top.  This was accomplished simply by drilling three holes and using screws to screw the top to the base.  I added a little wood glue to the area first and was careful not to drill all the way through the table.  I may not put anything too heavy on it, but it will certainly hold my lamp so I can read at night!    Not bad for something less than the price of a candy bar!!