Pages

Welcome to The Painted Squirrel!


Magic is believing in yourself. If you can do that, you can do anything! - Johann Wolfgang Van Goethe

Sunday, November 11, 2012

Busy Girl Painting and Design Dilemmas!

Good Morning!  When I first started writing this blog, it was easy.  I have so many ideas of what to write about and share with you that they practically wrote themselves down and I was able to write a week ahead!  It is still easy, except....when I'm busy painting!  I am going into my busy season with ornaments now and I need to find a way of working through my list and writing about the projects.  That didn't happen this week and so here I am on Sunday, writing for today's blog.  

Here are just a few of my ornaments going out this week!

I thought I would share with you a few design dilemmas solved by ingenuity (of the homeowner) and/or the use of paint.  I think we all have inherited some kind of awkward space or situation that needs to be addressed.  (Mine right now is my sitting room - more on that in the weeks to come!)

Let me start by saying that my sister in law is so creative!  I absolutely adore spending time with her and this past summer visited her in Memphis.  She solved a problem in her family room that I thought was genius!

Her fireplace started out similar to this photo (she didn't have a "before" photo, but she's promised to start doing that for me!  :)
Basically a brick wall with a fireplace in the middle and a raised hearth across the entire thing.  Having the brick removed can be pricey, and so she had a carpenter come in and build cabinets OVER the brick!


You would never guess there was brick behind those cabinets!  (The room looks dark because of my camera flash)

She had the carpenter just go around the hearth and to complete the illusion she had him but drawer fronts on the bottom to look like there is a drawer down there.  Pure genius!

I painted for a client with a long wall between the kitchen and family room.  She wanted to have a different color in the family room and so we painted this plant. (she helped me as this particular client is my very talented sister)  See how the color changes from one side to the other?  I've done this for others using just a simple checkerboard pattern.


Here are a few others that I found online that I think are great!

Hiding the big black box!
Great way to hide the thermostat - although you do need to make sure there is ample airflow around it
 Thank you so much for reading and also for bearing with me as I work the kinks out of writingthis precious blog into my crazy lifestyle!   I can't wait to show you what I'm working on this week! 


Sunday, November 4, 2012

To Market, To Market!

This has been such a week!  Between Hurricane Sandy and Halloween and filling ornament orders, not much writing has gotten done.  I wrote today's post a few weeks ago and thought today would be a perfect day to show it to you.  Have a wonderful day everyone and don't forget to reset your clocks!

A perfect fall morning and my son had a baseball practice in northwest Washington DC.  Across the street from the field on an industrial block, I saw a sign for Union Market.  Since I had two hours to kill, I decided to venture over there.  What a great place to stop in! 


According to their website, http://unionmarketdc.com/, Union Market began life as Center Market back in 1871, but when the Center Market was torn down so the National Archives could be built, the vendors sought another property and after a few moves over the years, it settled at 1309 5th St. NE.  Some of the vendors have been there for decades and I love the industrial feel of the building and the busy-ness of a farmers market that is only open three days a week.
 

There were several "just olives" vendors, an amish vendor selling dairy products, an "all things smoked" vendor (I think I drooled a little bit looking over some of the smoked fish) and a flower vendor that would have made Eliza Doolittle swoon, her flowers were so loverly! 


I was rather incredulous when I saw the Honest Tea vendor - who wasn't there (below)!  Just a rack of drinks and a box for your dollar.  I have never seen the honor system used like that and it's a testament to the folks who frequent the market that it actually works, even though I was a little nervous for the owners.

See the arrow on the sign that says "Pay Here"!  Wow!

I was introduced to Patty Pan squash by a gentleman running one of several vegetable stands.  Patty Pan squash looks like a regular yellow squash that's been, well, squashed - it's short and squat and delicious!  He told me to prepare them by stuffing them with crab dip and goats cheese, and that sounded great, but I'm kind of a recipe girl so I looked up a recipe on Allrecipes.com, Stuffed Patty Pan Squash (with bacon!), that was a huge hit at my house - pretty much anything that includes bacon as an ingredient is going to get rave reviews !  I'm including the recipe at the end of this post for you to try.

Patty Pan Squash


Best Banana Bread evah!
After shopping, I sat at one of the cafe tables outside in the sun with a latte and my nook.  I actually felt mildly hip sitting there with my reusable tote bag overflowing with fresh veggies, locally creamed honey and some home made double dark chocolate banana bread!  The people passing in and out of the building looked like they'd been coming and going through those doors for years and many greeted each other as old friends. 
I am hoping my son has many more practices at that field and the next time, I will bring him over to the market with me to pick out his own vegetables and fruits to try.  I'll have to remember to pack more totes!

Stuffed Patty Pan Squash recipe:  http://allrecipes.com/recipe/stuffed-pattypan-squash/

Ingredients

  • 6 pattypan squash, stem and blossom removed
  • 6 slices bacon
  • 1/2 cup diced onion
  • 1 1/2 cups soft bread crumbs
  • 1/4 cup freshly grated Parmesan cheese
  • salt and pepper to taste

Directions

  1. Preheat oven to 350 degrees F (175 degrees C).
  2. Bring one inch of water to a boil in a saucepan over medium-high heat. Add squash, cover, and cook for 10 minutes, or until a fork can pierce the stem with little resistance. Drain, and slice off the top stem of the squash. Use a melon baller to carefully scoop out the centers of the squash. Reserve all of the bits of squash.
  3. Place bacon in a large, deep skillet. Cook over medium high heat until evenly brown. Remove bacon to paper towels, and set aside. Saute onion in bacon drippings. Chop the reserved squash pieces, and saute them with the onion for one minute.
  4. Remove the skillet from heat, and stir in the breadcrumbs. Crumble the bacon, and stir into the stuffing along with the Parmesan cheese. Season to taste with salt and pepper. Stuff each squash to overflowing with the mixture, and place them in a baking dish. Cover the dish loosely with aluminum foil.
  5. Bake for 15 minutes in the preheated oven, or until squash are heated through.

Thursday, November 1, 2012

Faux Your Eye's Only!

I hope everyone had a safe and happy Halloween last night!  I also am keeping our northeast friends in my prayers that power comes back on soon!

I am always amazed at the creativity of others.  I have had so many clients who have truly inspired ideas, but they just need someone else to actually do the painting for them.  This little table is one of those projects.  My client had this bare wood side table still in the box and she knew she wanted to use it for her guest room.  She said she'd like it to look like someone had laid their book and glasses on it and drifted off to sleep.  Lovely!  Even as she was decribing it to me, my inner squirrel was darting all over the place collecting ideas.
Bare Wood Table
I chose to use an antique book I picked up at a yard sale, it had lovely pictures and I thought that would bring some additional character to the table.
 OK, I know not everyone can paint the book and glasses freehand, but that's OK.  Imagine a more simplified book, say a Dr. Seuss book with gorgeous colors and simple drawings.  You could photograph the book open to the page you like, print the photo and then use carbon paper to trace it onto the table.  Then it's just a matter of painting the colors they used in the original book.  Voila, an original hand painted table for your child's room or a playroom!


When you are trying to make something appear to be sitting on top of the surface, shadows and light are the most important factors.   If you paint a darker shadow on the outside edge of your painting, the eye will read that your painting is three dimensional.  I usually will use a watered down slightly darker version of the table's paint color for the shadow.

The glasses I used were my own reading glasses and quite literally, I rested them on the real book on the table next to the spot where I was going to paint them, and painted the lights and shadows exactly as I saw them.  Note:  make sure you know where the light is coming from in the room the table will reside and make sure your light source when you paint is coming from the same direction.
I also changed the text in the book so the main characters were my client and her husband.  It was a minor detail, but really makes the table special to them.  If I were doing that Dr. Seuss table, I may be tempted to change the text to my son's name or maybe write his name in a tree - anything to make it personal.


My last detail was to the drawer of the table.  I painted a little monogrammed hankie that appeared to have folded over the top of the drawer.  Two coats of sealer and done! 

This project was a blast and I loved that my client had such a clear sense of what she wanted, but yet allowed me to take her idea and use my creativity to expand on it.  What book would you paint on your table?  Pride and Predjudice?  Where The Wild Things Are?  How about really giving your guests something to talk about and paint Fifty Shades of Grey!

Monday, October 29, 2012

How a Vulture is Born...

Remember paper mache?  I think we've all done it as kids and I wanted to try it again for a halloween decoration - a vulture.  As we all hunker down for Hurricane Sandy, why not pull out the flour, water and newspapers and try and make something out of it?  It doesn't have to be a vulture, but maybe a pumpkin (cover a balloon)? 
Materials:
flour and water for the paper mache
newspaper strips
tray or bucket to mix paper mache
chicken wire (about $9 for a small roll)
Wire cutters
Pliers
Piece of wood to use as a stand
screws (to screw the vulture into the wood)
craft paint - black/white/red/green
black flowers
Small skull or bones to place beneath him

Start by using the wire cutters and carefully cutting some chicken wire to the size you'd like your vulture.  I used about 2 feet.

I shaped the wire into a imperfect football shape and then used a bit more wire to make two cylinders for his legs and I wired them on.  Whe you purchase your chicken wire on a roll, they use long pieces of wire to hold the roll together - that is the wire I used to attach the legs.

I used a piece of balled up newspaper and taped it into the shape of the head and neck, then taped it onto the wire body frame, about half way between the top of the frame and the ground.

Here is my framework, ready for the messy, messy part.  Somehow I didn't remember paper mache being such a sloppy mess, but was glad that I did this in the garage and used garbage bags to protect the area!  By the way, don't do this project right after a manicure!

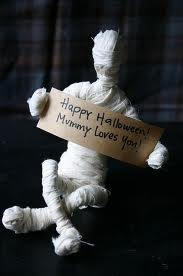
 Looking a little more like a mummy than a vulture at this point.  To mix the paper mache, I used about 2 cups of flour and just mixed enough water in to make it a loose paste, sort of like a thick pancake batter (maybe a cup of water?).  I tore the newspaper into strips and carefully dipped it into the better and then ran the strip through my fingers to take off the excess.  Then I started to wrap.  I had to wait for one side to dry and then turn the vulture over and do the bottom since the strips wouldn't stay on upsidedown.
Doesn't everyone hang a vulture on their planter in the front of their house to dry?  My neighbors must think I'm nuts, but this was a great way to completely dry him!  Once dry, I painted the body black, the head red and the beak white with a black tip.  I also painted in the eyes.

The cost of black feathers was a little more than what I wanted to spend, but I found these black flowers at Michaels and thought the petals had that cartoonish look I was going for and so I pulled them apart and cut the petals off.

 The finished product!  His name is Marvin!  I used a coat hanger, bent to look like feet and screwed the whole thing to my board, which I painted green to blend in with the grass.  A small skull completes the look, but I will be adding some bones as well.  Unfortunately, with Hurricane Sandy coming to our area, he'll be enjoying his bones inside until Halloween!
See how the petals make a cute feathery necklace and bottom of his legs?

I will also build up his claws with some more paper mache since I think the wire is too spindly for such a large bird, but that will have to wait as I start preparing for our storm and bringing in everything that could fly away - including Marvin here!


Sunday, October 28, 2012

A Walk on the Wild Side!

A Walk on the Wild Side
I love it when a designer asks me to paint their clients' existing furniture.  Some of the designs are so much fun and so different from the original that you'd NEVER know it was the same piece! 

If I've never done a particular finish, I will sometimes do a "practice" piece to work out the kinks on one of my own pieces instead of the designers.  More on that in a moment.

I was asked to change this charming chest of drawers from demure to wild zebra!  What a difference!  The idea came from the creative mind of Kristin Drohan (if you check out her website/blog, the console table in her header may look familiar... http://www.boulevardinteriordesign.com/)


Remember I mentioned practice?  Well, here's my practice piece:

I picked up this dry sink at a yard sale for $12 and decided to use it for our liquor cabinet in our dining room.  Because the doors open from the center, I opted not to do the center stripe that Kristin had requested on hers.  I had a piece of mirror cut (also around $12) by the local glazier (glass cutter) for the inside back panel to add a little sparkle.  You can just see the reflection of the crystal bowl in the mirror.  The inside I painted black and on  the doors wrote the saying
"With wine in hand, one reaches the happy state,
Where men are wise,
Women beautiful,
And even one's own children begin to look promising"
...it always makes me laugh!

I can't tell you how many compliments I receive on this piece.  Keep in mind though, that when you are using something that really stands out, like a zebra pattern, a little goes a long way!  You could look like you live at the zoo if you go too overboard!

Here are a few other ideas to check out and how I would paint them:

I found this console table at the left at http://interiorsmadeeezzy.com/category/furniture/occasional-tables/ and love the fact that it is an animal print, zebra again, but because it is all one color, it's much more subtle!  I would do this by using a matte finish on my base coat and then a gloss finish for the stripes, and probably the legs and top as well.  This may be a future project for me - I really like how it adds texture to the piece. 


The photo on the left is another example.  This time leopard and a silvery finish from furnituredirectnc.com.  Benjamin Moore paints have some beautiful metallic finishes and I would use one of them over a grey or brown basecoat to get the silvery finish on the sides and top.  The cool silvery tones with the warm browns and blacks of the leopard print are not usually paired together, but I like it. 


Of course it doesn't have to be a console table.  A little animal print on a barstool, chair, throw rug or even a mirror frame can add just that little touch of wild for you.  I found this chair on juliekfournier.com.   Somehow the mix of prints are adorable in a child chair!  Of course, for a child, we can always go over the top!

 Now I can feel you looking around your home for something to paint in an animal print...what will it be?  Have fun, be daring and GO WILD!

Thursday, October 25, 2012

An Unfortunate Bug Problem...and Recipes!


When you first walk into my home, you find yourself standing in a small foyer which opens to the living room and dining room on the left and right.   Directly in front of you are two pillars which hold up the second floor (I think).  A perfect place for my giant spiderweb and spiders.  The smaller spider at the bottom was made by my son in third grade - oh yes, I use everything.  It's that same child who is now over six feet tall and keeps walking into the webbing.  He's complained about it to me, but truthfully, it makes me laugh so hard when he does it that I am not going to change it at all! 


I have a recipe to share - perfect for Halloween and VERY EASY!  It was given to me by a friend of mine named Sandi, who brought it to a party and almost had to pull us off each other as we devoured it!  Seriously, it is light and airy and totally delish!  

Pumpkin Fluff Dip
Ingredients
1 (16 ounce) container frozen whipped topping, thawed
1 (5 ounce) package instant vanilla pudding mix
1 (15 ounce) can solid pack pumpkin
1 teaspoon pumpkin pie spice
'Nilla Wafers
Directions
In a large bowl, mix together instant vanilla pudding mix, pumpkin and pumpkin pie spice. Fold in the thawed frozen whipped topping. Chill in the refrigerator until serving.  Serve with 'Nilla Wafers to dip.


The second recipe I am sharing is also from Sandi, but I haven't tried it yet.  I will tell you that when she described it to me, I think I drooled a little so I thought it would be share-worthy..let me know if you try it!

Oreo Balls
1 pkg. (8 oz.) PHILADELPHIA Cream Cheese, softened
36 OREO Cookies, finely crushed (about 3 cups)
2 pkg. (8 squares each) BAKER'S Semi-Sweet Chocolate, melted
Make It
MIX cream cheese and cookie crumbs until well blended.
SHAPE into 48 (1-inch) balls. Freeze 10 min. Dip balls in melted chocolate; place in single layer in shallow waxed paper-lined pan.
REFRIGERATE 1 hour or until firm.
***************************Special Extras********************************
Sprinkle cookie balls with additional cookie crumbs.
Seasonal Variations
Snowmen OREO Cookie Balls: Prepare as directed, using BAKER'S White Chocolate, and adding a snowman face to each with decorating gels and frostings. Christmas Tree OREO Cookie Balls: Prepare as directed, using BAKER's White Chocolate, and using decorating frosting to draw Christmas tree designs. Top each with a cinnamon candy.
For Easier Dipping
Use a toothpick to dip the cookie ball into melted chocolate; shake off excess chocolate then place on waxed-paper.


ENJOY!

Sunday, October 21, 2012

Scary Transformations

I am moving along on getting the house ready for Halloween.  I tend to not go overboard with decorating for the seasons or holidays, although I greatly admire those who do and wish I had the organizational skills and the energy!  I change up just a few things to make the house feel like it's shifted into a new gear, and one of my favorite things to do is to change the items in my china cabinet.  I have a "spring/summer" cabinet, and a "fall/winter" cabinet.  Because I love dishware, china, milk glass, depression glass and the like, rotating my collections is a way for me to appreciate them all during the year without having to keep everything out all of the time. 


Before - Spring/Summer Cabinet - Light, bright and floral!
 

Mid-term - Basic Fall/Winter - Red, Gold and Green Depression Glass!


  To the left is my basic fall/winter cabinet.  I will adjust items as the season goes on, replacing the gourds with silver christmas balls for the holidays and adding some Currier & Ives plates, for example. 
I have always saved little pieces of halloween costumes and trinkets that my boys have worn over the years, and I  use them to change the china cabinet into a more frightening showcase for the month of October!   It's a fun way to remember years past.

Skeletal hands coming out of tinware, weapons of a dark and sinister nature at the ready, and all manner of mice, bats and spiders! Oh my!


More "appetizing" eyes...


One lump or two?


Please pass the creamer!!!

Mmmmmm, cake!


Ready to do battle!
 
Bloodthirsty goblets!

He never expected we'd have him over for dinner!

Once again, I like it to look like a normal cabinet until closer inspection, but if you want to do the spider webs and blood spatter, go for it!  Of course you can do a more fun version for younger kids - save all of those tutu's, cute ghosts and friendly witches costumes and masks and make it beautiful!  Maybe remove everything and make it a showcase for a graveyard, or just put a bunch of scary masks on plates so they look like heads!  The bonus of using the china cabinet as a diorama showcase is that little ones can't get into it and grab small objects, but yet it's well lit and they can enjoy the display all season!

Now...whom shall I invite to dinner...(cue Vincent Price's laugh) Bwahahahahahahaha!