Pages

Welcome to The Painted Squirrel!


Magic is believing in yourself. If you can do that, you can do anything! - Johann Wolfgang Van Goethe

Sunday, October 27, 2013

C'mon Get Scrappy!

Good morning!  This week I've continued my mission to clean out my studio of odds and ends.  I began by making totes last week with all of the leftover fabric I have and believe that I've barely made a dent in the fabric stockpile!  The totes were fun to make and I'm sure I'll be making more now that I sort of have the hang of it, but this week I decided to try something new, rag dolls.  How hard could it be, right?  Well, I went online and found this link with simple instructions (fyi - I always add the word "simple" or "easy" when I google a project..same goes for recipes..:))

Here's the link:  whimsypapermache.blogspot.com

I wasn't able to download her actual pattern because I was using my Ipad and can't print from it, so I decided to try and copy it.  There were a few misses, but eventually I settled on one that I liked.


First, the Oopsies...
Too square - she looks like a linebacker!

Too tiny - I couldn't even get a chopstick into her arms and legs to turn them inside out!  I did try to experiment with hair on this one though - then decided that yarn hair would work best as it suggested in the link!


A little creepy..I tried to do the face less round and she wound up with a jaw that makes Farrah Fawcetts jawline look heart shaped!

 Last night, we went to dinner with my husband's cousin, his wife and two adorable daughters that they adopted from China.  I decided to make the girls each a rag doll. 
I am loving mixing up the fabrics!

Here are the others..


I need to work on the eyes a bit, this one looks a little glazed over..


I will likely be experimenting with a few more this week if I can, I may try a Halloween doll since the holiday is so close.  In between these projects, I've been doing a lot of ornament orders, which of course I love, but they do take time from writing and researching for this blog!  It's a problem I enjoy having to deal with for sure!   Have a wonderful week!

Thursday, October 17, 2013

Having a Tote-al Blast!

Well hello again!  I just looked up my most recent post and it's been since June that I posted last!  I took a small haitus to focus on time with my family this summer, especially with my college bound son who we brought to his new school in August.  Not too many tears from me, which was very unexpected, but he looked so happy and I know he is in the right place - I guess that made it easier for me to let him go.

A few weeks ago I looked around my studio and realized I have ALOT of stuff - and I mean all manner of "stuff"!  Like a lot of crafters, I save every little bit of everything with the thought that one day I might need it for a work of art (hey, it could happen).  Well my "stuff" has taken over and I made a resolution that if I couldn't find a craft to make with it, I would toss or recycle it!  First stop, my leftover fabrics...

I went online and found an easy pattern for a tote bag here:   http://www.hgtv.com/handmade/make-an-easy-to-sew-lined-tote-bag/index.html  No kidding - it is so easy and there is NO hand stitching!  Perfect for the lazy crafter like me!  I invited my sister and one of our besties over with their sewing machines for a "Stitch-N-Bitch" night, I bought wine and pizza and rented The Heat with Sandra Bullock.  Not only did we have a great night, but by the next day, I felt creatively inspired and rejuvenated!  I haven't felt like that in a while!

Here are some of the bags that I made and a clutch made by my sister Sandy.  Our friend Kimberly made curtains for her Mom and for some reason we forgot to get a photo!  Oh well, next time!


It took a few tries to make a Minnie Mouse inspired tote, but I like the final product!

The boys needed to be represented as well (plus I had a little of the sports fabric in my cache) so I made one for them.

Leftover fabric from my previous chair covers.


...and leftover fabric from my current chair covers!

This one I made for my son's girlfriend who just had knee surgery.  It was my first attempt at doing some smaller piece work, but I wanted it to have a boho flair and an extra long strap so she could use it as a spare pocket around the house while she's on crutches. 
Sandy's beautiful clutch.  She made this as a birthday gift for a friend of hers.  She had some lovely embroidered fabric and decided to showcase it on the front of the clutch.  It turned out just beautiful!

The Inside detail.

I will be hosting other "Stitch-N-Bitch" nights in the future - it was a tote-al blast!!  I will also be going through more of my "stuff" in the studio and trying to figure out what to do with it.  For now, I am still working on the totes and getting rid of my fabric scraps.  This morning, I just found a fabric basket that I'm going to try.  I'm open to suggestions if you have any other ideas!  Have a great week everyone!


Saturday, June 29, 2013

Daddy Long Legs!


Happy Father's Day Dad!
 When we were little girls, my sisters and I had to learn how to walk very fast to keep up with my Dad.  Not only is he over 6 feet tall, but he is a naturally fast walker (just like I'm a naturally "good eater")  One of his steps was equal to about three of ours and we'd gallop along beside him in our Mary Janes, trying not to fall behind.  We loved it and, truth be told, Dad was probably walking along at a third of his normal gait for us.

Now this month I've feel like I've been doing the same thing, only not as fun.  It seems that with my son's graduation, Father's Day, the end of the school year and some new projects that I've been asked to do, all I can do is run to try and keep up!  I envy those people who can get it all done and seem so organized, they are the fast walkers of our world.   I am Herve Villechaize to their Shaquille O'Neal and even though the view is great from down here, my legs are tired!  So tomorrow I am heading for the lake house for a few weeks and cannot wait to rest my aching gams!

I have several things to show you this week - potluck style since none of the projects really relate to each other.  First, back to the garden.   I wanted a little table or something to set my coffee or tea down next to the garden bench.  Back to the basement for some in home shopping!  I found this candle holder that I haven't used in years - actually the candle itself had never even been lit.

Looks pretty "garden-y" right?
I used a hack saw and removed the base, then I drilled some holes for drainage in the top so water wouldn't collect.
Then I pushed it in until the bottom "branch" was just under the dirt - this helped to stabilize it.

Perfect!

Next just a little blurb about my son's graduation party centerpiece.  I just gathered up "school" items and threw it all into the middle of the table (OK, maybe not "threw", I arranged it rather quickly though)  I wrapped a rubber band around a glass vase, then inserted pencils and crayons between the rubber band and glass.  When I was done, I tied a ribbon in his school colors to hide the rubber band and put in some flowers.   (thank you for helping with this one Mom - it was a little tedious although not as bad as your Rock Star effort icing 98 cupcakes!!)

Calculaters, glue sticks, a dictionary, thesaurus, erasers - they all look great grouped on the table with the kids photos tucked in!

My niece also graduated - oddly enough, different schools but they both had the same school colors!

Lastly, a project done by one of my dearest friends, Lisa.  Lisa decided to paint her master bedroom furniture black.  The pine was nice, but a little too country for her now.  She opted for using oil paint (cue menacing music) and the results are amazing!  She has promised to send me more photos of the room since she's now also painted the bed, night stands and had the floor changed from carpet to hard wood!  I'm still not an oil paint kinda girl, but with these results, maybe I should rethink it!
I think this is the paint she used...
Saint Andie...really, you shouldn't have! (Let's all ignore the terrible touch up job I did changing the "r" to an "i" and just go with it...)

Before

After.  Some new drawer pulls and HELLOOOO GORGEOUS!

So that is it for this week and it's off to the lake!  There is something truly magic about finding a place where you are able to let go of the hands that are pulling you along your life and just be.  I hope you all have a place like that so this summer you can take some time to relax, be grateful and enjoy all of the things you've been running to keep up with.  Have a wonderful week everyone!

Sunday, June 9, 2013

C'mon Get Happy!


 Is there a point when you just get tired of playing it safe?  For me, this is the time.   The print that my husband and I bought has actually given me the courage to change up my colors and just go for it!  Aqua and red! Wow!  The challenge for me has been using these colors and keeping the style fairly traditional - I am finding that it's very easy to make it look too youthful (think teens bedroom) or too contemporary.  I'm sure I will tweak it along the way but I am nearing completion on my quest to lighten up and embrace our more fun, fanciful side!                             


The family room - Before. 
After


The art print at last!  So different from anything we've ever had, but we just love it.  It reminds us of our family - snow people who would love nothing more than to find that we've drifted into the tropics!  I still need to get a picture light to hang over it but we all smile every time we look at.

On to the eating area of the kitchen!

The barstools - Before
 
After

The Bakers Rack - Before, forgotten on the porch (don't you love the fake plant?)
After - spray painted white
The stripes on the barstools looks great with the pattern on the seat cushions!

Moving into the sunroom.  The walls in this room have been aqua for years now.  It didn't relate to much else in the house, but I loved it so much that I've kept it all this time.  Now it looks wonderful as a backdrop to the other rooms!

I spray painted the previously brown lamps white


My husbands family wine press.  I had a huge plant in there that I've just cut way back.  Now it looks a little sparse, but I know it will come back even more beautiful!

 This week will be very busy with the last days of school and my eldest son's graduation from high school.  I'm so happy for him and so sad for Bob and I!  We are so proud of him but will miss him like crazy when he goes to college in the fall.  Have a great week everyone!


Sunday, June 2, 2013

The Way-ay-ting Is The Hardest Part...

Last week I mentioned that Bob and I bought an art print at a show.  It's still not back!!  No, they aren't running late - I'm just impatient and want to see it hanging on my wall!  No matter, I've been going great guns to get everything else done and updated.

Here are a few of the projects I've been working on.

First the bookshelves.  You can see that I'm taking the same bright aqua color on the back of the shelves that I used in my office and bringing it into the family room.  What a breath of fresh air!

Before
After


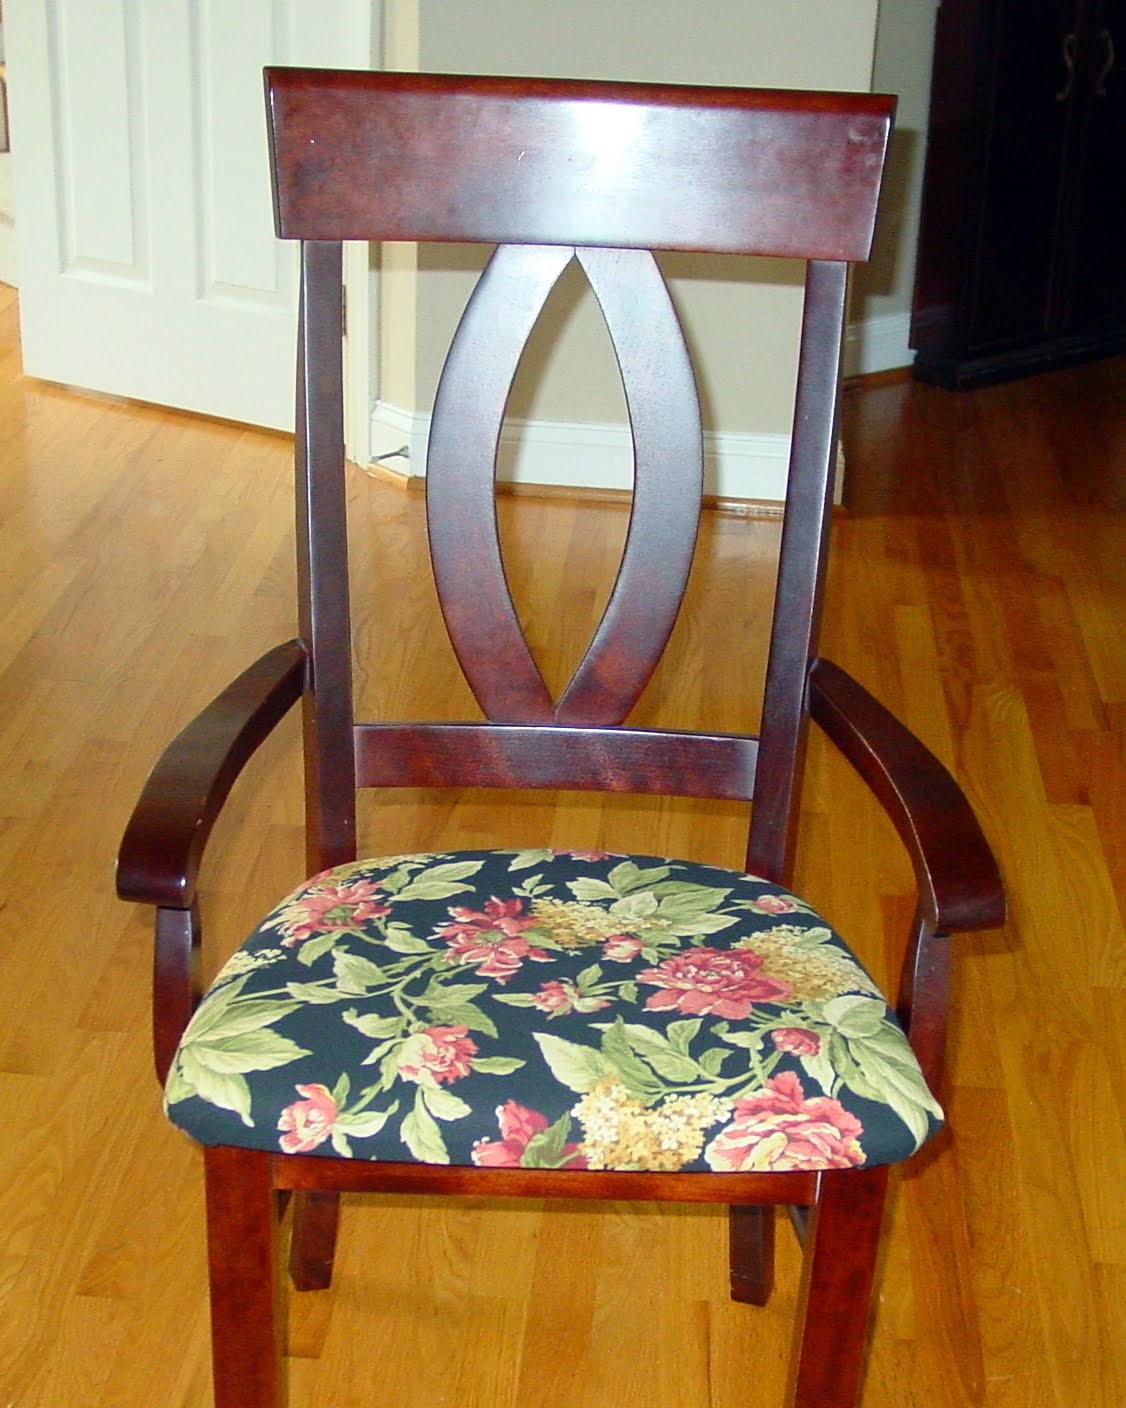
Now the kitchen table chairs.  When I first bought them on Craigslist, the original fabric was an off white - you can't see in the photo but it was dirty and stained so it had to be changed.  I don't have a before photo of my kitchen table, but the base was a dark green stain.
Original

First transformation to match my red/green decor


After!  Wow!  I used indoor/outdoor fabric so it will be more durable.  I love the bright colors against the white table base!


That's a new sisal rug on the floor.  Simple and easy to clean.


My sunroom table was a given to me by a neighbor who knows I like to get free furniture and paint it.  It's been in my sunroom waiting for me to decide what to do with it.

Before.  Great carvings and funky legs.

After - Cherry Red!  That is also a new white shag rug in the sunroom.
 Moving back into the family room, we had some World Market shelves that I use for the TV receiver.  The wood is a little dark now that I have an aqua rug in there (yes, aqua - what the heck am I thinking???).

Before

After - I also put a canister light behind it so at night the red depression glass still glows in the up-light. (For those of you who love depression glass, you'll notice there are a few imposters in the lot - no matter, they look great together!)
Another World Market table - this one I also bought at a yard sale and the wood is also a little dark for my bright room.  The new print is going to go right above it on that wall.

Before - with a little sneak peak at the aqua rug!


After


After
 Well, that is all I can show of my projects this week.  There are still several pieces being painted and they'll be done soon.  Hopefully by next Sunday I can show you the happy rooms!

Now, here's a little project my sister worked on this week.  She just moved into a new apartment and needed something to use as a headboard.  She bought two sheets of a lightweight board at Home Depot, primed and painted them ($13 for both).  So creative and I can't wait to see them hanging above her bed! (I'll post photos when she emerges from the box jungle that is her place right now.  Moving is always tough.)  Have a wonderful week everyone!


Gorgeous Sandy!